Introduction

AI Tools is a WordPress plugin that injects artificial intelligence into WordPress websites and enables it to make use of advanced features like content generation, chatbot etc.

About this Plugin

This plugin integrates with OpenAI, an artificial intelligence research company, through their API and utilizes their technology to deliver the functionaliy to owners.

Technology

This plugin is built with Php, Javascript, HTML and CSS.

Getting Started

Install the Plugin

To install plugin/addon directly from the admin area.
  1. Download the plugin to your computer, then log in to your WP admin area and go to Plugins > Add New.

  2. In the new page, click on “Upload Plugin” button on top and then click on “Choose File”.

  3. Locate the plugin zip file in your computer and then press “Install Now” button.

  4. Once everything is ready, in the next page, click on “Activate Plugin” button


Uploading via FTP.
  1. For a manual install of a plugin/addon, first download the plugin to your computer.

  2. Start the FTP program and then navigate to the wp-content folder.

  3. Upload the plugin folder in your computer to wp-content/plugins folder.

  4. Then press the “Activate Plugin” link on the plugin page.

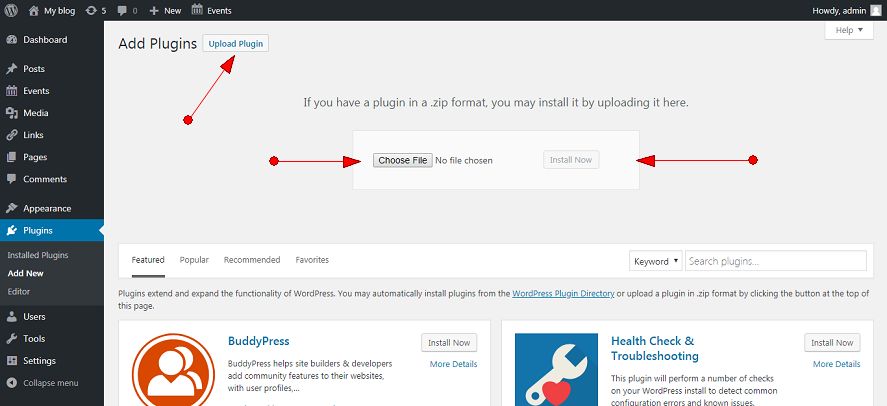
If you want to learn more about using ftp to install plugin, please check these links:

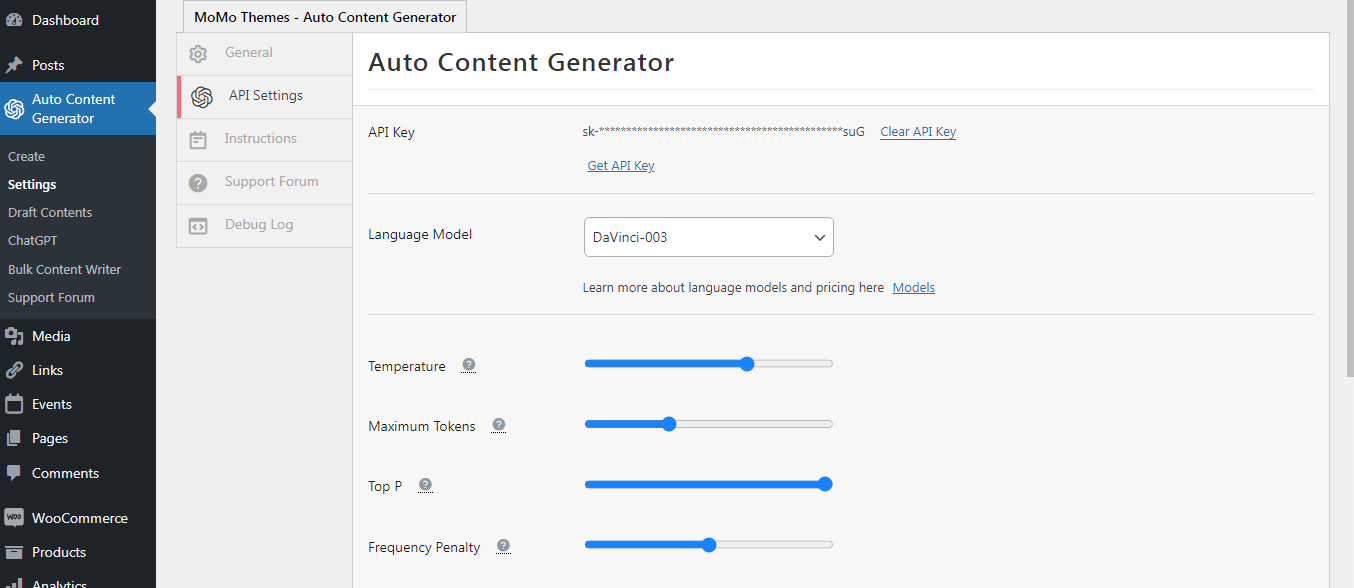
https://www.godaddy.com/help/install-a-wordpress-plugin-with-ftp-26312
https://www.wonderplugin.com/wordpress-tutorials/how-to-manually-install-a-wordpress-plugin-via-ftp/
https://youtu.be/QQBYh6UlGxE

Basic Features

OpenAI API connection - Adding API Key

To use the content generation feature, it should first connect with OpenAI through API. Go to Auto Conent Generator > Settings and then add the API key in the 'API key' textfield and click the 'save changes' button at the bottom. The API key can be collected from here


Various options are available to determine the output needed with regard to the generated text.


Generating Content

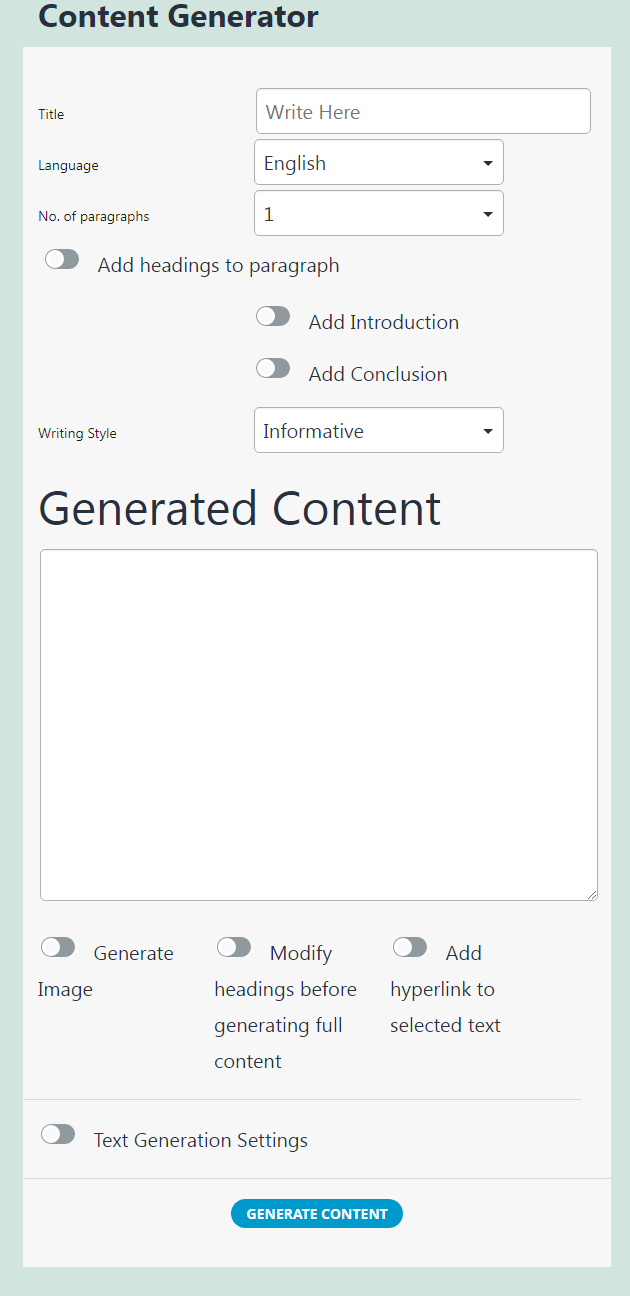
There are 3 ways the content generator can be used. All have similar layout and structure but accessible at different point.

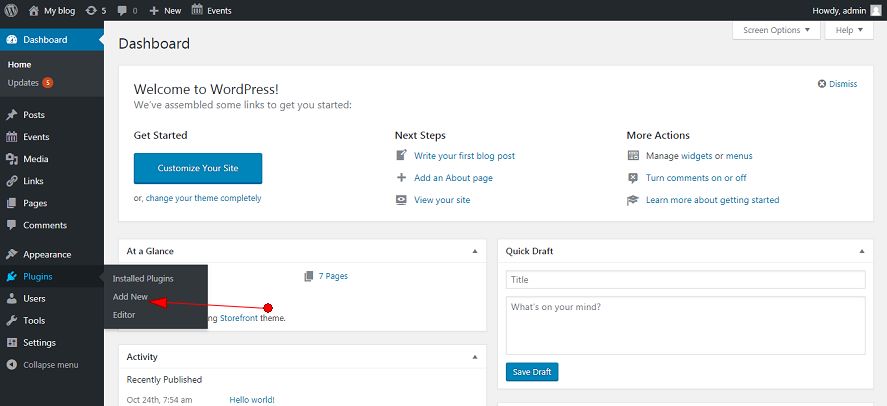
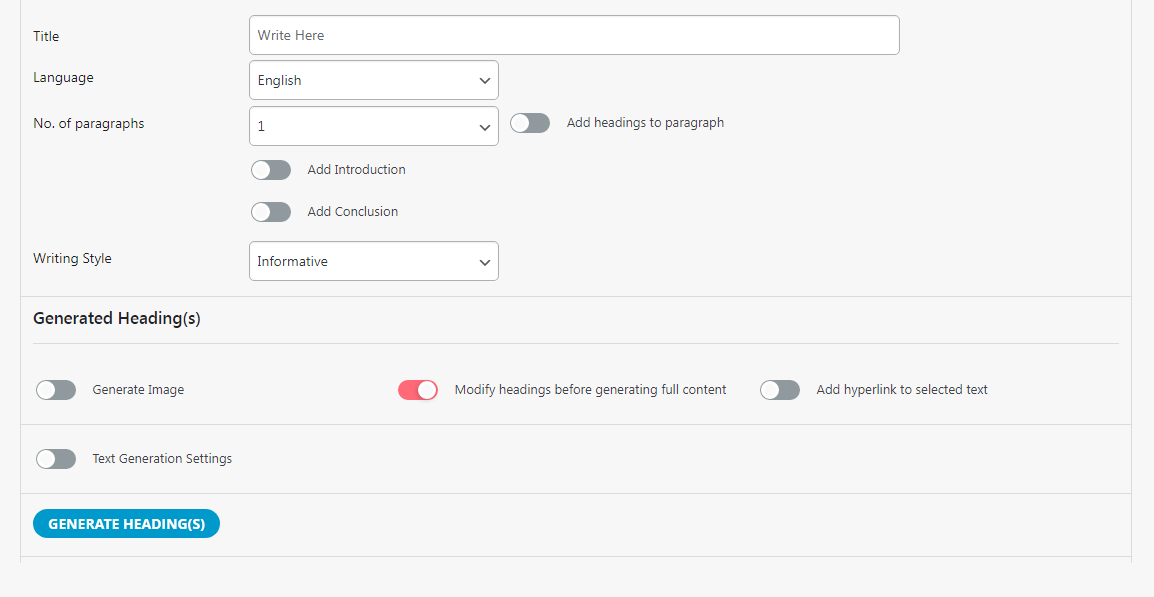
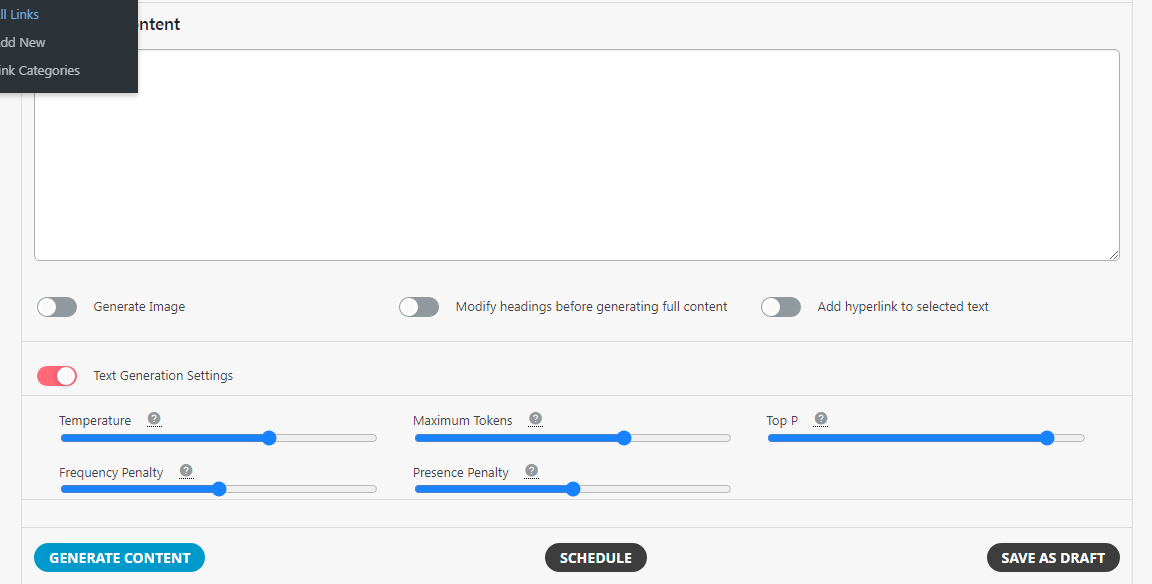
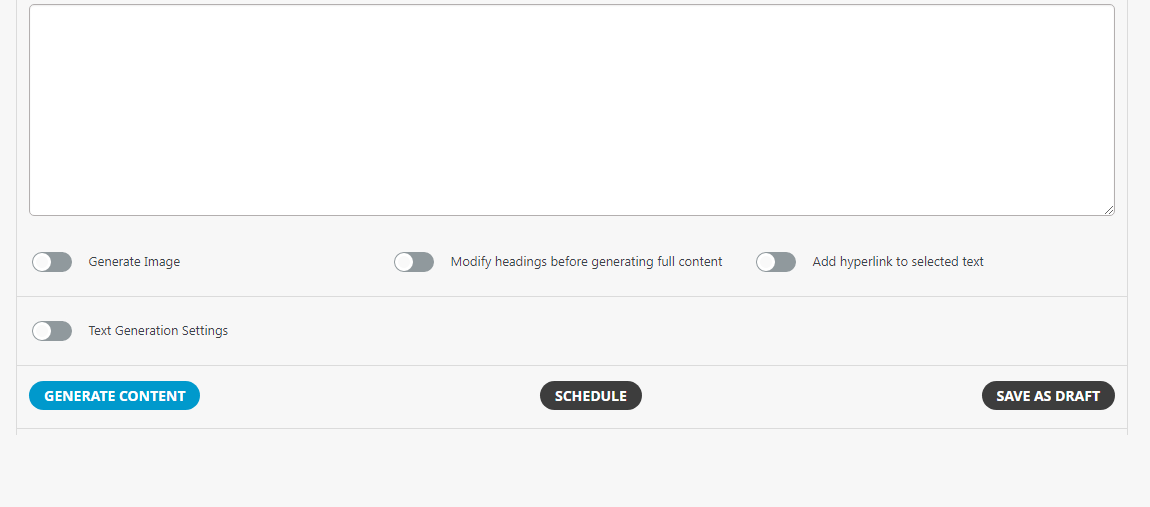
1 An independent content generator can be accessed at Auto Content Generator > Create.

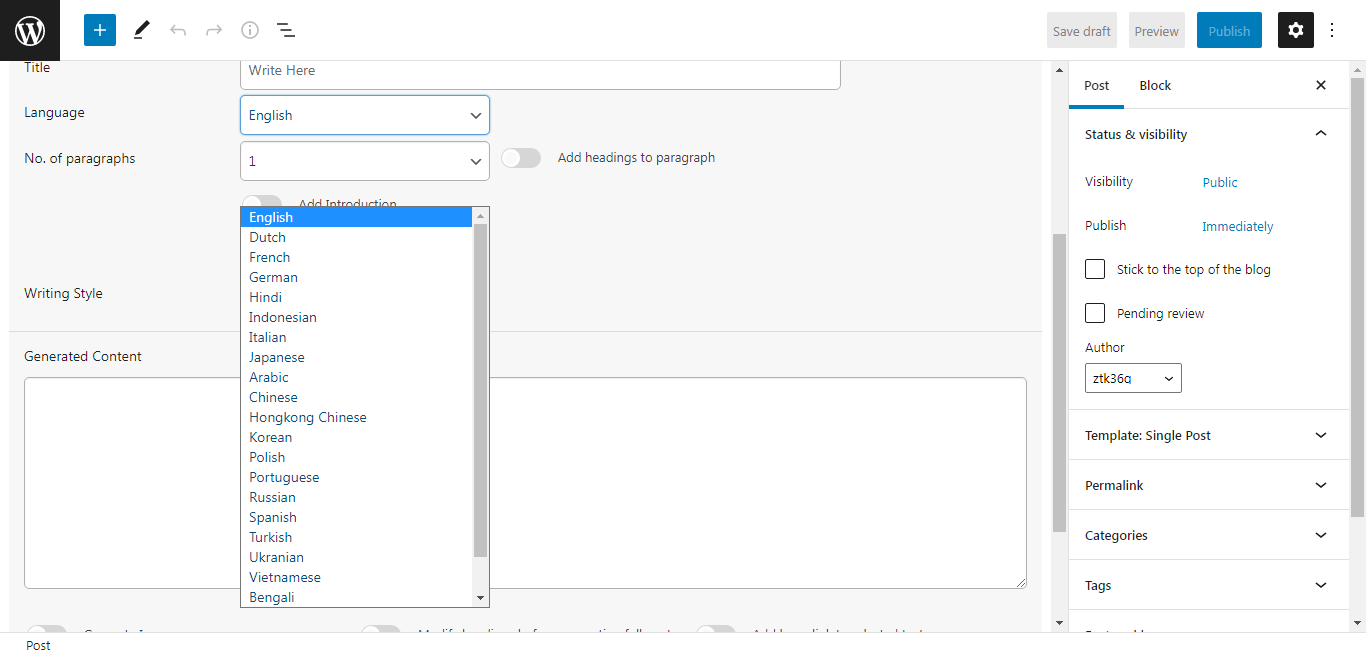
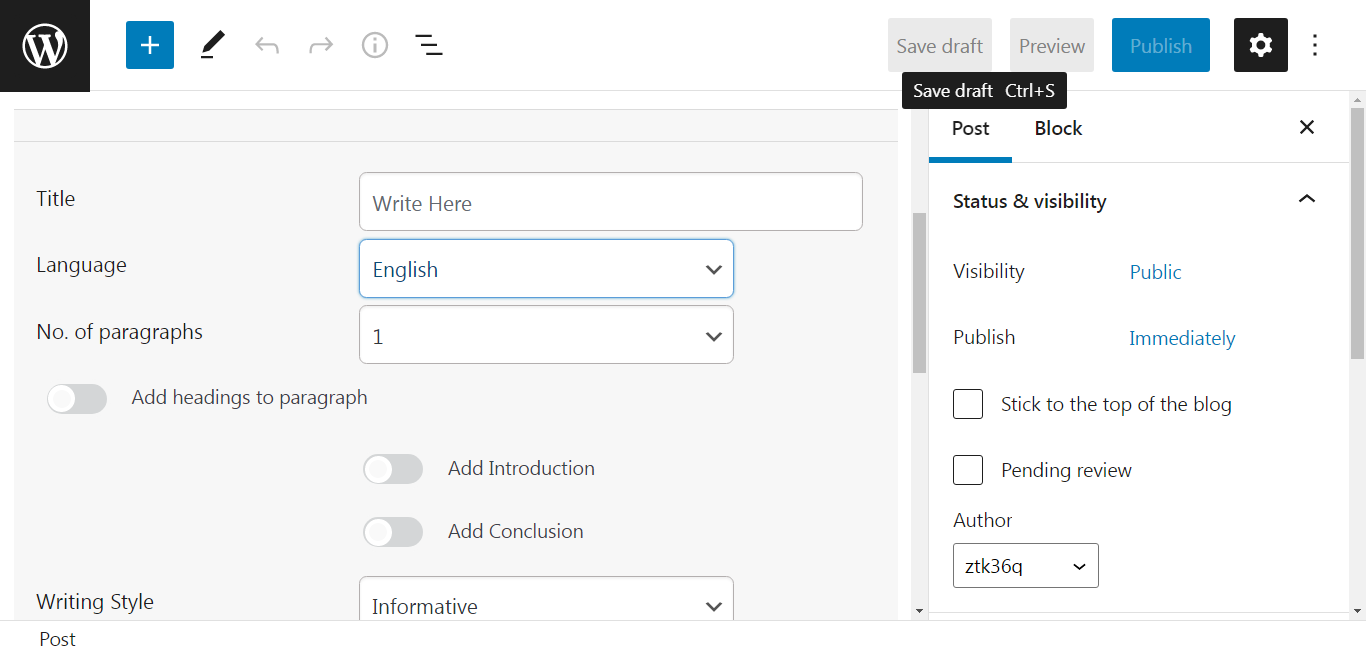
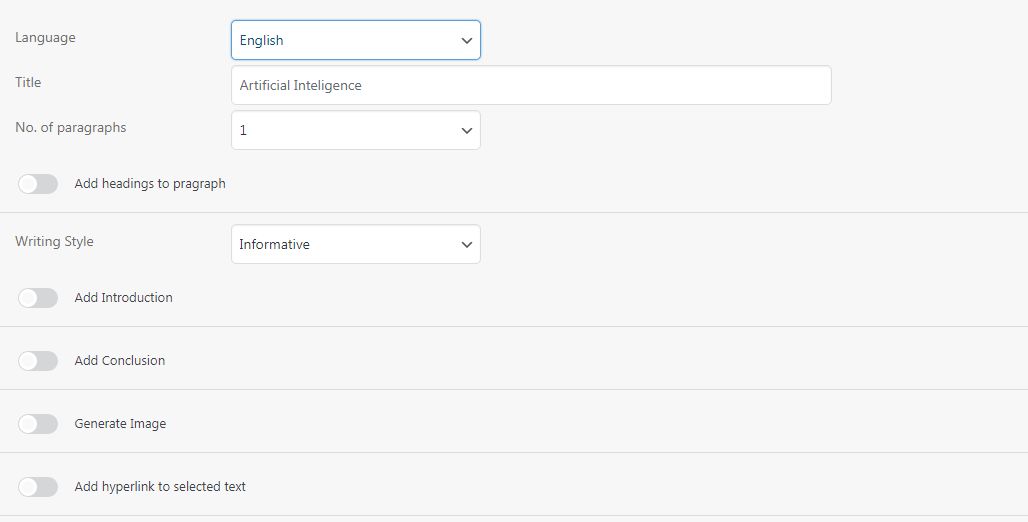
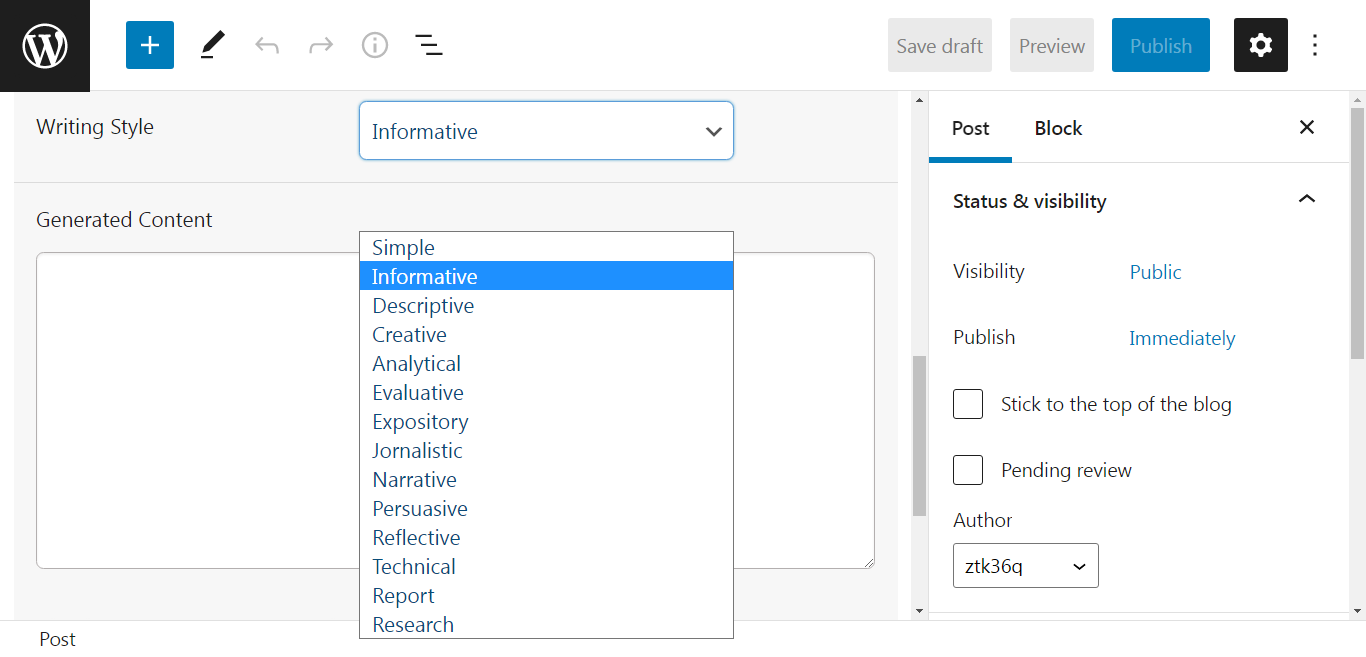
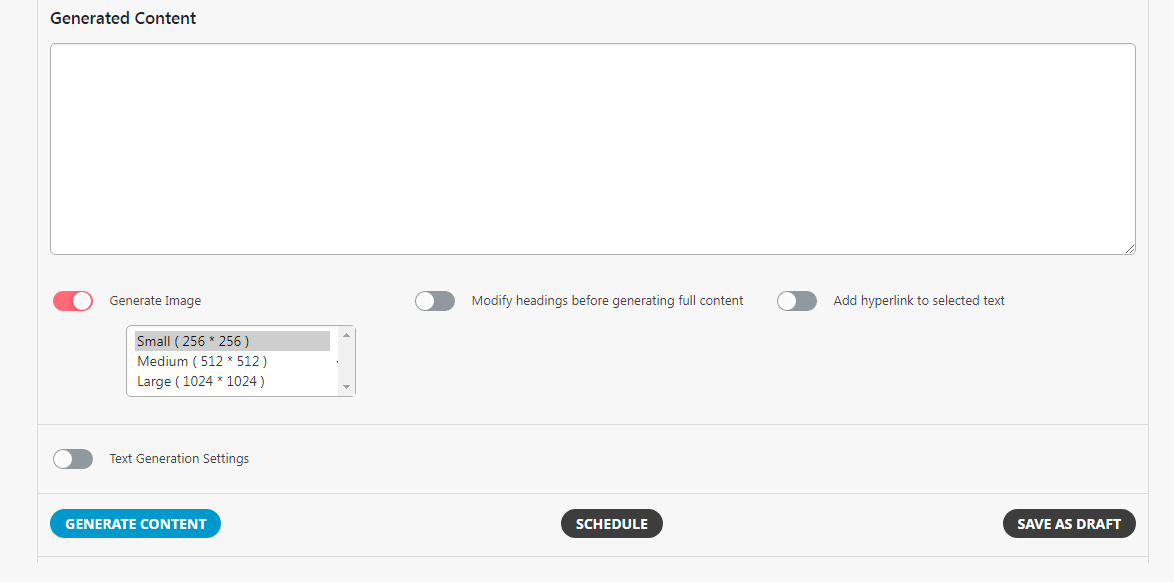
2 In a post or a page, content generator will be available as a metabox.

3 When using Gutenberg, it will be available as a block.

Using Content Generator

  1. In dashboard, go to Auto Content Generator menu and click Create.
  2. Language: Select the language to generate the content/text
  3. Title: The title field is where you input the title or topic you want the system to generate the content about.
  4. Heading: Enable this option if you want the sytem to add headings in the generated content. The wrap option will convert the heading into h1,h2,h3,h4 accordingly..
  5. Writing Style, Introduction, Conclusion:Choose "Informative","Descriptive", "Creative" style for the generating articles. Option vailable to include Introduction & Conclusion in the content.
  6. Image: If enabled, the system will genarte an image associated with the content automatically.
  7. Heading Modification: Using this option, the system will generate headings, based on the original title, before generating actual content. It will allow user to make edits, adjustments to the heading so that the system will gneerate the artcile accordingly.
  8. Hyperlinks: This will add a hyperlink to the text chosen.
  9. Configuration: This is same otions available in the Settings page but the configurations here will override the Settings page.
  10. Schedule: With the schedule option, you can set the content generation for future time, which the systme will execute automatically according to your set time.


WooCommerce Product Descripton Writer

Select the products you want to generate descriptions for, and the plugin will generate the descriptions in just a few clicks.


  1. Create / Open a product page.
  2. Add a title.
  3. Click generate button.
  4. Options: Various options are available to determine the output needed with regard to the generated text.

  • Temperature: Higher temperature generates less accurate but diverse and creative output. Lesser temperature will generate more accurate results.

  • Max Tokens: Use it in combination with "Temperature" to control the randomness and creativity of the output.

  • Top P: To control randomness of the output.

  • Frequency Penalty: For improving the quality and coherence of the generated text.

  • Presence Penalty: To produce more concise text.


Bulk Writer / Scheduler

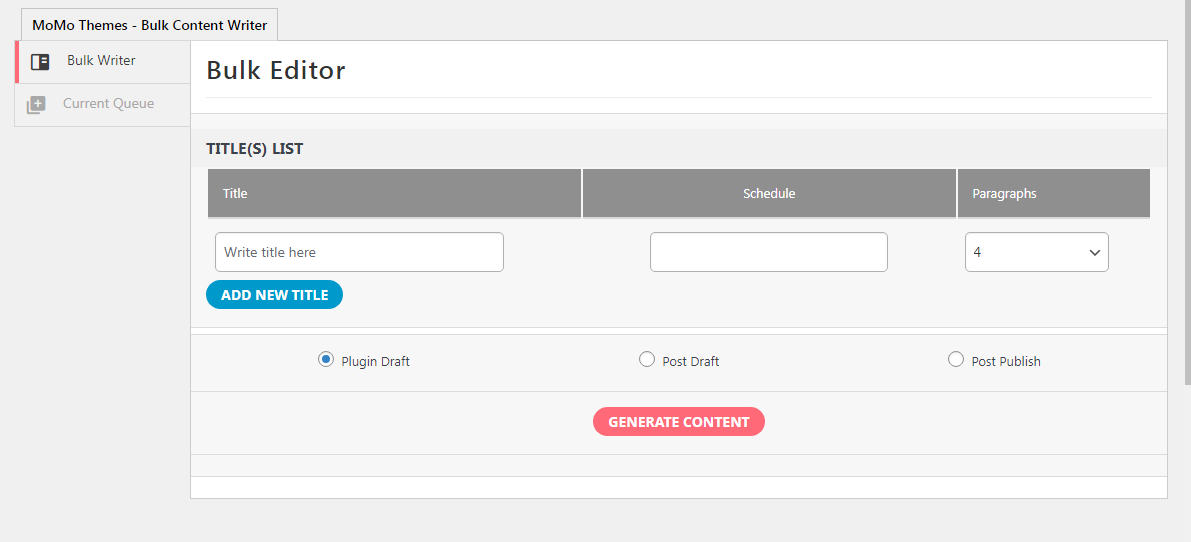
You can set it to create multiple contents and schedule it for future time. This will save a lot of time. Just write the titles and select the number of pragraphs and set the time.


Restrict Access by User Roles

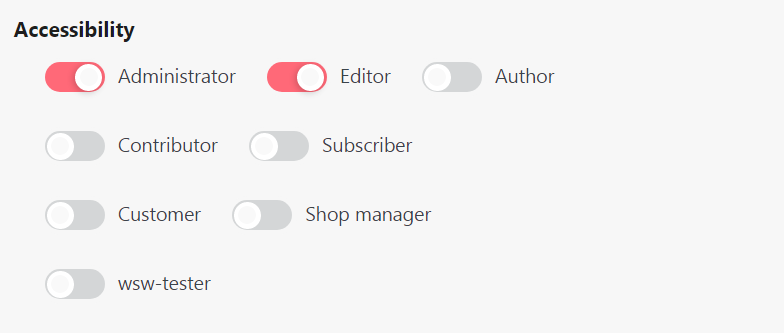
By default, WordPress has 5 user roles. Using the access settings, content generator can be made to be available for only those uers who have spcific roles. It will also recognize custom user roles created by third-party plugins or themes.


Enable by Post Types

The content generator be made to appear for only selected post type. Including Post and Page, it can also be made to display under custom post types created by other third-party plugins or themes.


Chatbot

Chatbot can be enabled in any page by just adding [momo_add_single_chatbot] shortcode.

Various oprions are available for API configuarations and UI styling for the chatbot. These options are available in Auto Content Generator > Settings > Chatbot.

API Configuration
  1. Context: Give orders to the AI to act in certain way.
  2. Model: Various options to run the chatbot on
  3. Temperaure: This determines the randomnessa and creativity of the response.
  4. Sentence Buffer:
  5. Input max-length:
  6. Content Aware:

Advanced Features

Paid Access

Provide access to the content generator to your users.
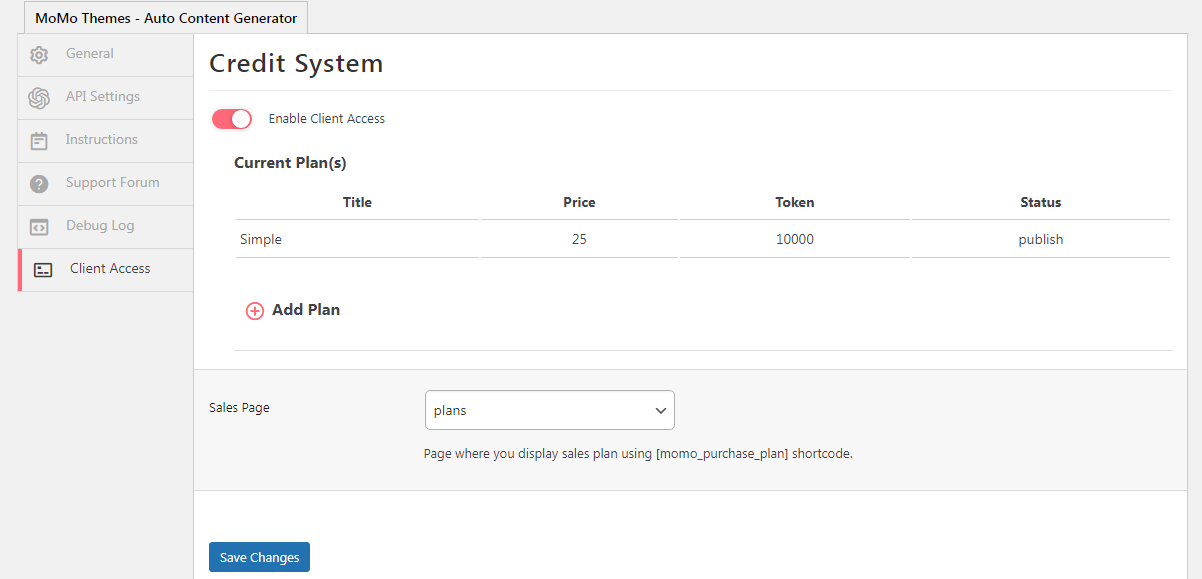
Credits

Credit system allows creating plans for paying users and assigning them with tokens to be able to use the content generator The payment gateway, processing, invoicing etc related to the purchase of the plan are all handled by WooCommerce.


Creating Plans

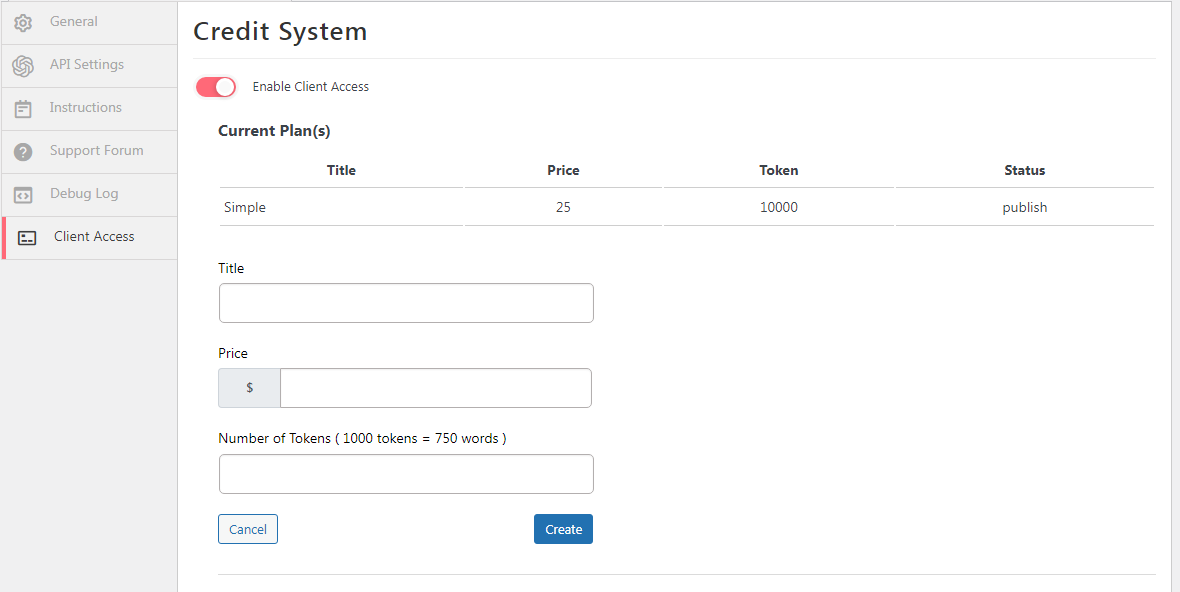
Start by clicking on "Add Plan". In the form that opens, give a name for the plan in the title field. Next, add the price. Tokens are how openai measure words. It is also how they charge for using the API. Allocate the numer of tokens for the plan in the provide field There are several language models and openai charges different rates for each. So, o learn more about rates, go to this link

Plans Page

Create a new page and add [momo_purchase_plan] shortcode.
This new page will appear under Sales Page dropdown options. Select the page and hit the save button. 
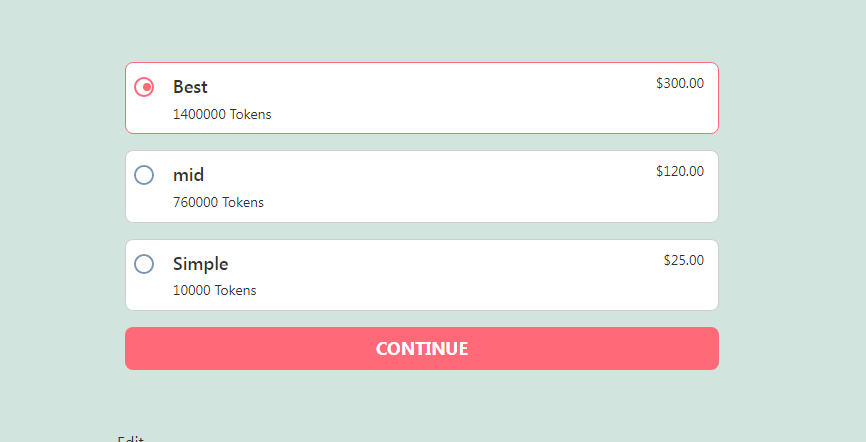
Next, open the page on the front and the plans will appear for user for purchase. after the user select a plan and clicks, continue, checkout, payment gateway, processing and other purchase-related funcions are all handled by WooCommerce.

Frontend Content Generator

Create a new page and add [momo_cs_content_generator] shortcode. Open the page at the front and it will display the content generator. Any user who has purchased the plan can now use the contenet generator It will not work if the user has not made any purchase


Support Desk

Our support covers assistance with issues directly linked to the plugin only. We cannot provide web design agency service or help with customization requests. Sometimes we may help with small tweaks, but they are not always guaranteed.

Please visit our profile page or ask question info@momothemes.com

Support for item includes:
  • Responding to questions or problems regarding the item and its features
  • Fixing bugs and reported issues
  • Providing updates to ensure compatibility with new software versions

Item support does not include:
  • Item support does not include:
  • Support for third party software and plug-ins

Before seeking support, please...
  • Be sure your question is not a request for custom work and is a valid Addon/Plugin issue.
  • Go through the documentation thoroughly to learn how to use the different settings before asking support on how to accomplish a task.
  • Make sure the issue is not caused by another program instead. Try disabling any active plugins and change the theme back to default WP theme and see if the issue gets resolved.
  • Undo the custom changes you have applied and check once if the issues gets resolved before contactng us for support.


Files Included

Stylesheets Included

Given css file primarily contains all the code used for styling the admin panels. Use the codes in the file to customize the addon/plugin even further. The included file is under momo-acg/assets/css/

  • 1. momo_acg_admin.css - Admin side stylesheet
Javascript Included

This is the Javascript file with custom codes used to make the addon/plugin work. All JavaScript codes are included under momo-acg/assets/js/

  • 1. momo_acg_admin.js - JavaScripts