WSW - WooCommerce / Shopify / WordPress syncing
Plugin documentation version 1.0
Table of Content
- Item Name : WSW - WooCommerce / Shopify / WordPress syncing
- Item Version : Version 1.0
- Author : Mo:Mo Themes
- Support via Email : info@momothemes.com
This plugin integrates WooCommerce ( WordPress) and shopify and allows seamless import of shopify products into WordPress and automatically converts them into a WooCommerce product.
How to Install Plugin/Addon #back to top
Install via WordPress Admin
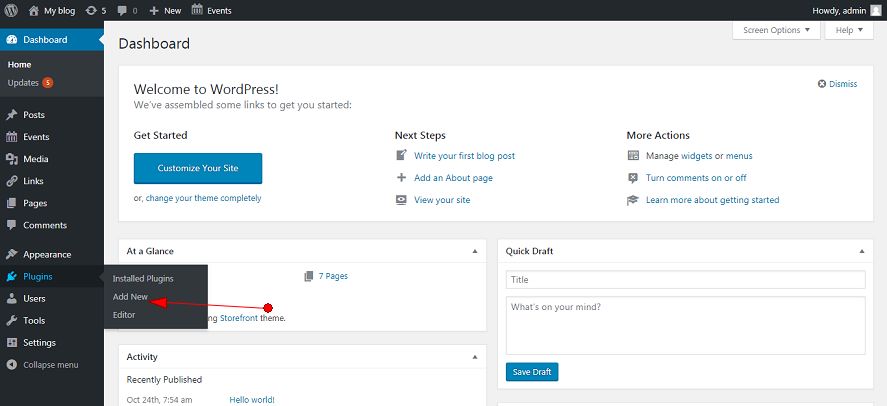
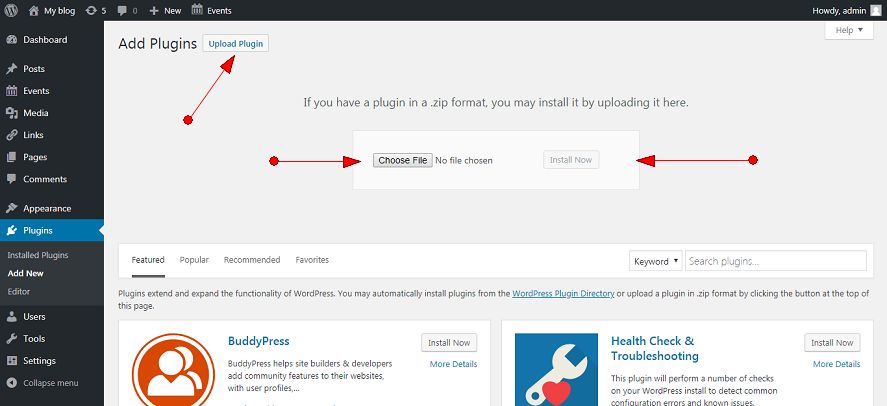
To install plugin/addon directly from the admin area. Download the plugin to your computer, then log in to your WP admin area and go to Plugins > Add New. In the new page, click on “Upload Plugin” button on top and then click on “Choose File”. Locate the plugin zip file in your computer and then press “Install Now” button. Once everything is ready, in the next page, click on “Activate Plugin” button.
Upload via FTP
For a manual install of a plugin/addon, first download the plugin to your computer. Start the FTP program and then navigate to the wp-content folder. Upload the plugin folder in your computer to wp-content/plugins folder. Then press the “Activate Plugin” link on the plugin page.
If you want to learn more about using ftp to install plugin, please check these links:
https://www.godaddy.com/help/install-a-WordPress-plugin-with-ftp-26312https://www.wonderplugin.com/WordPress-tutorials/how-to-manually-install-a-WordPress-plugin-via-ftp/
https://youtu.be/QQBYh6UlGxE
Settings Panel #back to top
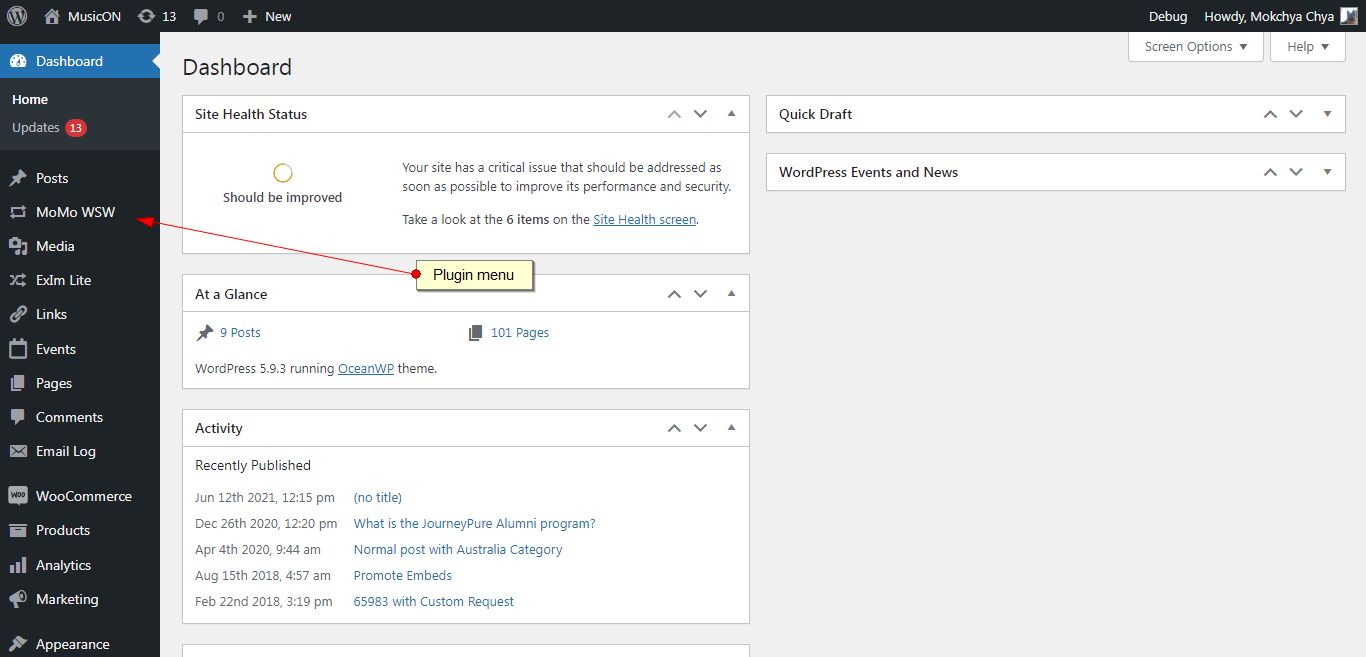
Once the plugin is activated, “MoMo WSW” link will appear in the left menu
Clicking on the link will bring up the Settings panel.
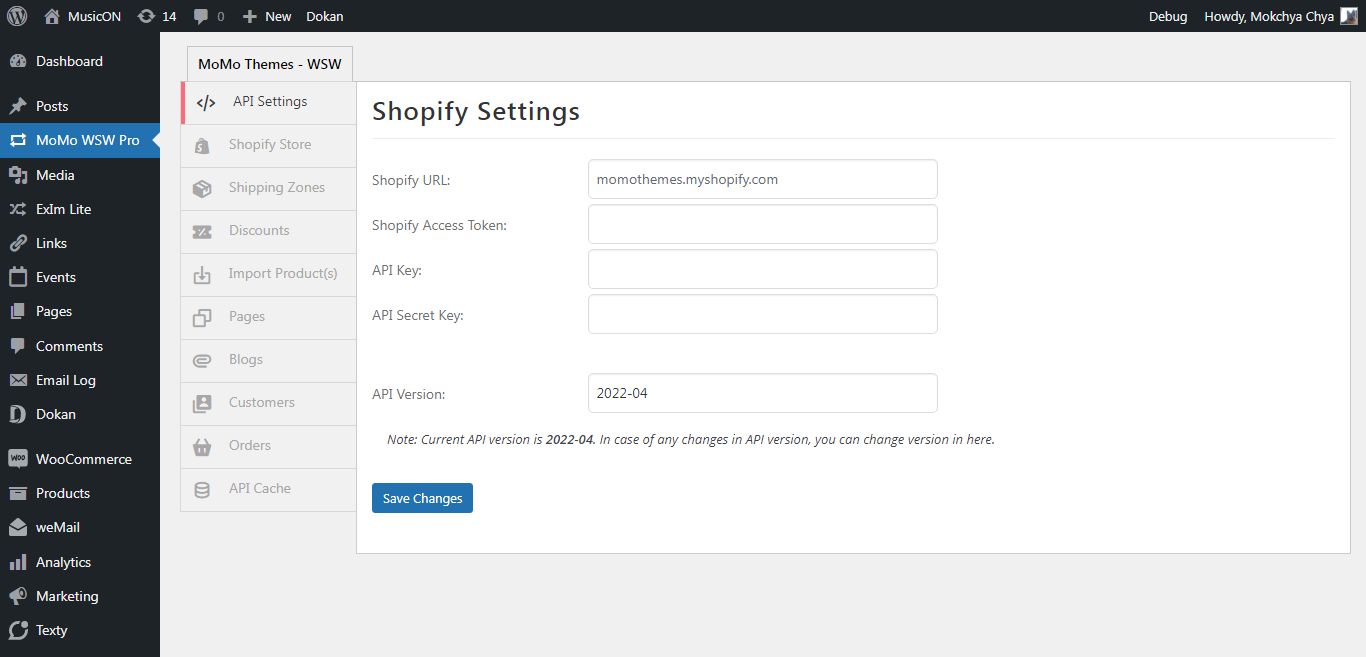
Connecting with Shopify #back to top
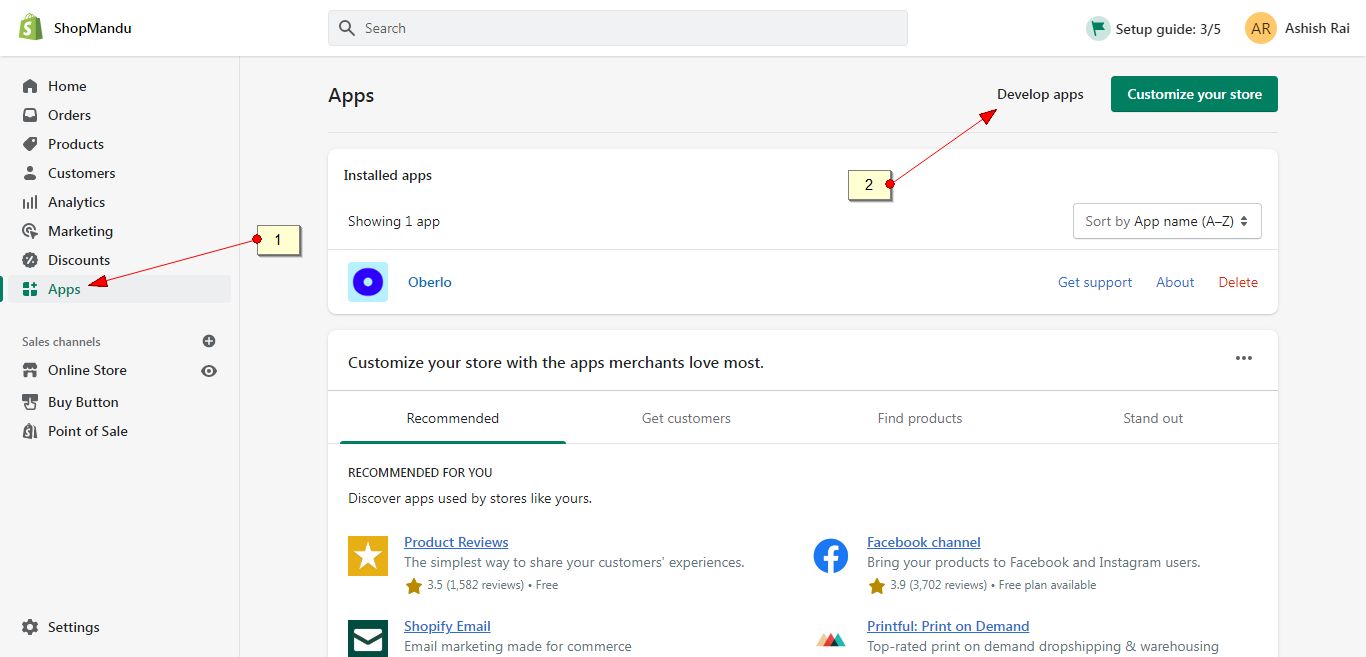
1 ) Log into your Shopify account and in the dashboard click on ‘app’ menu on the left side.
2 ) Click on the ‘Develop apps’ option at the top, right
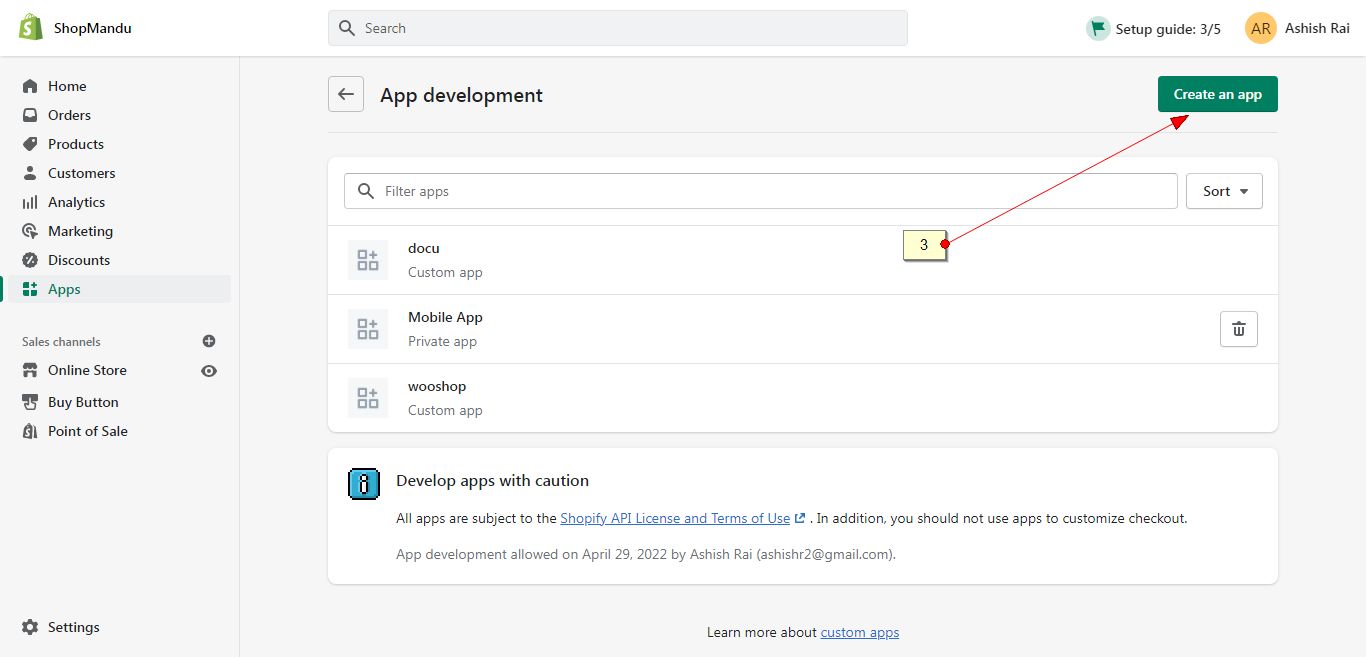
3 ) Click on the green ‘Create an app’ button and in the form that pops up, give your app a name and then click on ‘Create app’ at the bottom.
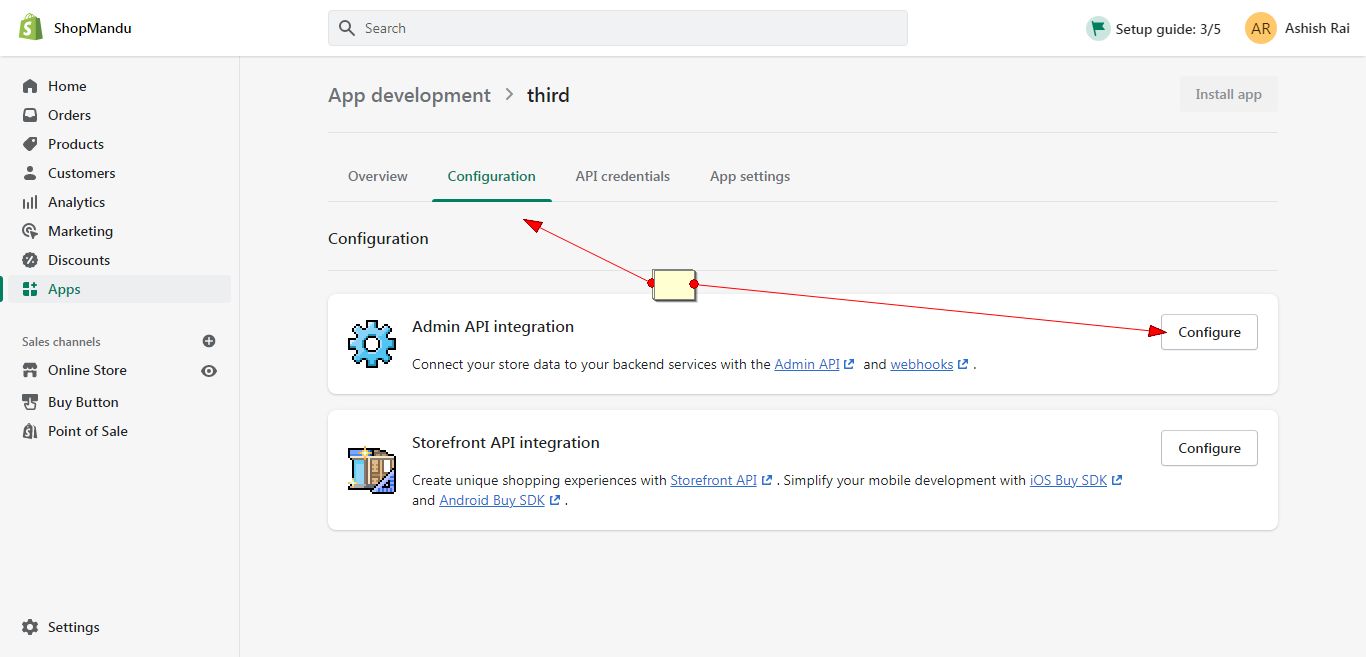
4 ) Next, click ‘Configuration’ tab on top and again click on ‘Configure’ button in ‘Admin API integration option

5 ) Under ‘Admin API access scopes’, check the ‘read_products’ option and them save it

6 ) After that, click on green ‘Install app’ button on top
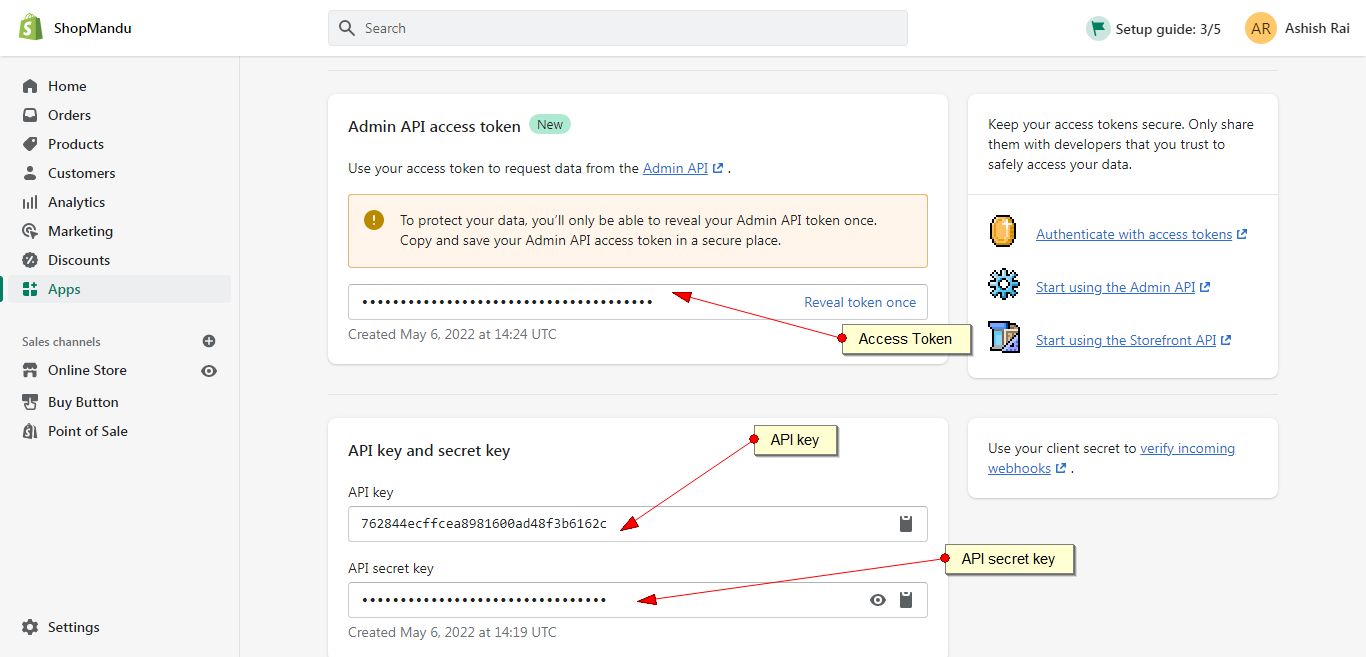
7 ) You will find access token under ‘Admin Access Token’. Click ‘Reveal token once’, copy the token and paste it in the ‘Shopify Access Token’ field.
8 ) Similarly, copy and paste the API key & API secret key in similar manner
9) Finally, click the save button and the site is now connected with Shopify.
Importing Products By ID#back to top
Go to Shopify Import section. By default, the option to import Product by ID is available. Add the shopify product ID in the field.
To find the Shopify product ID, open the product in a new window. In the browser’s address bar, you will see a full url. The product ID will be the last numbers, eg:
https://thenice999.myshopify.com/admin/products/10303141709
Then click on ‘Fetch Product’ button.
The system will fetch the product and show a success message as well as options to import tags/categories and product variations. Select these options accordingly.
Finally, choose if you want the status of imported items to be Published, Pending, Draft and then click ‘Import Product’ button
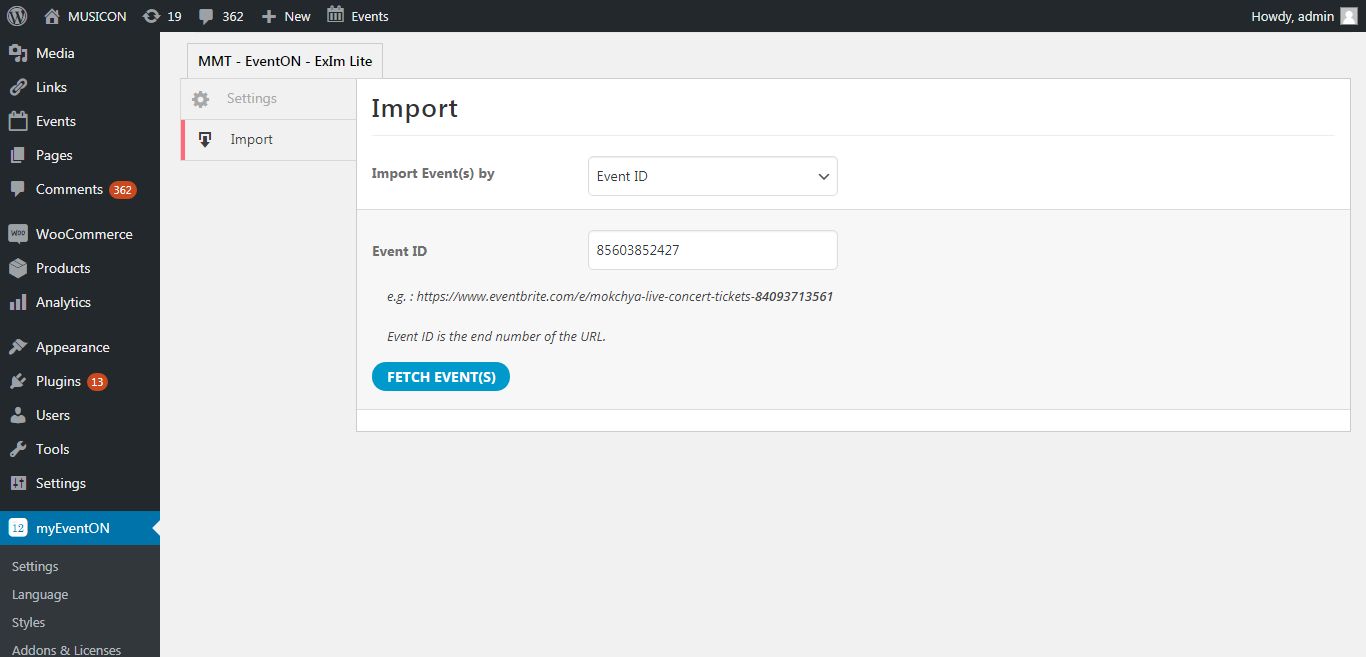
Product ID

Fetching
After event ID is added, hit the "Fetch Events" button.
It will pull the events
Click "Import Product" button
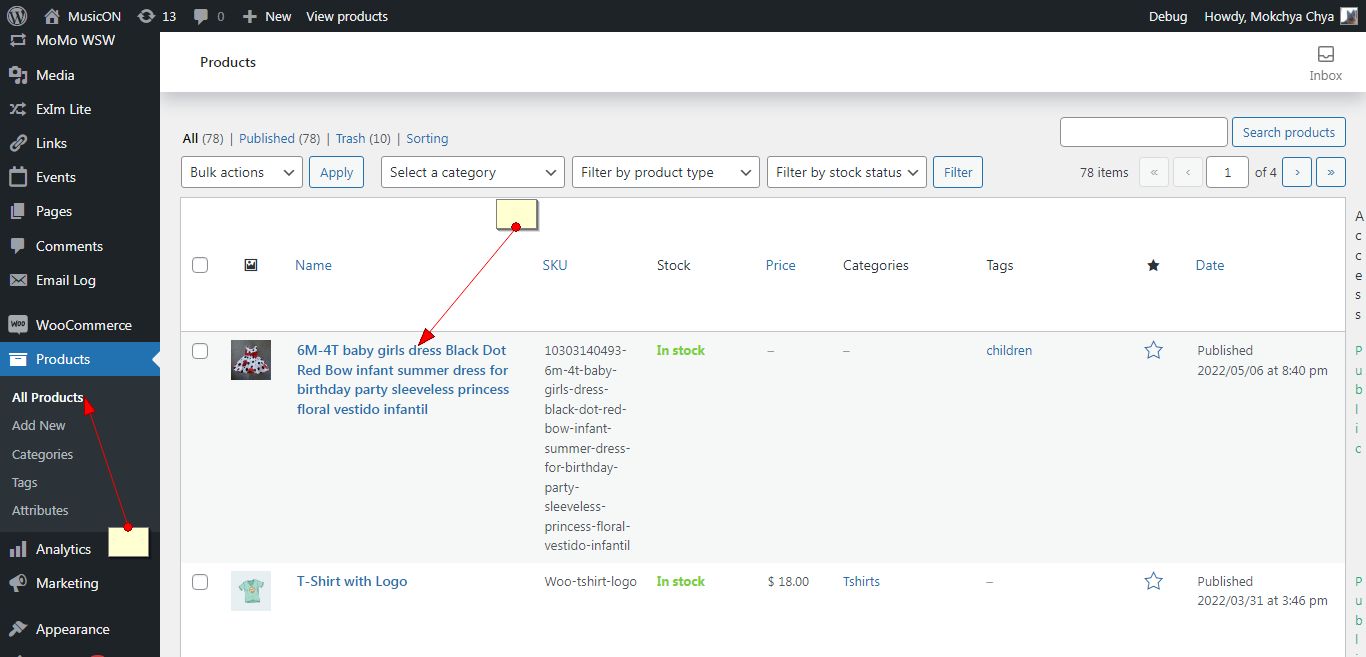
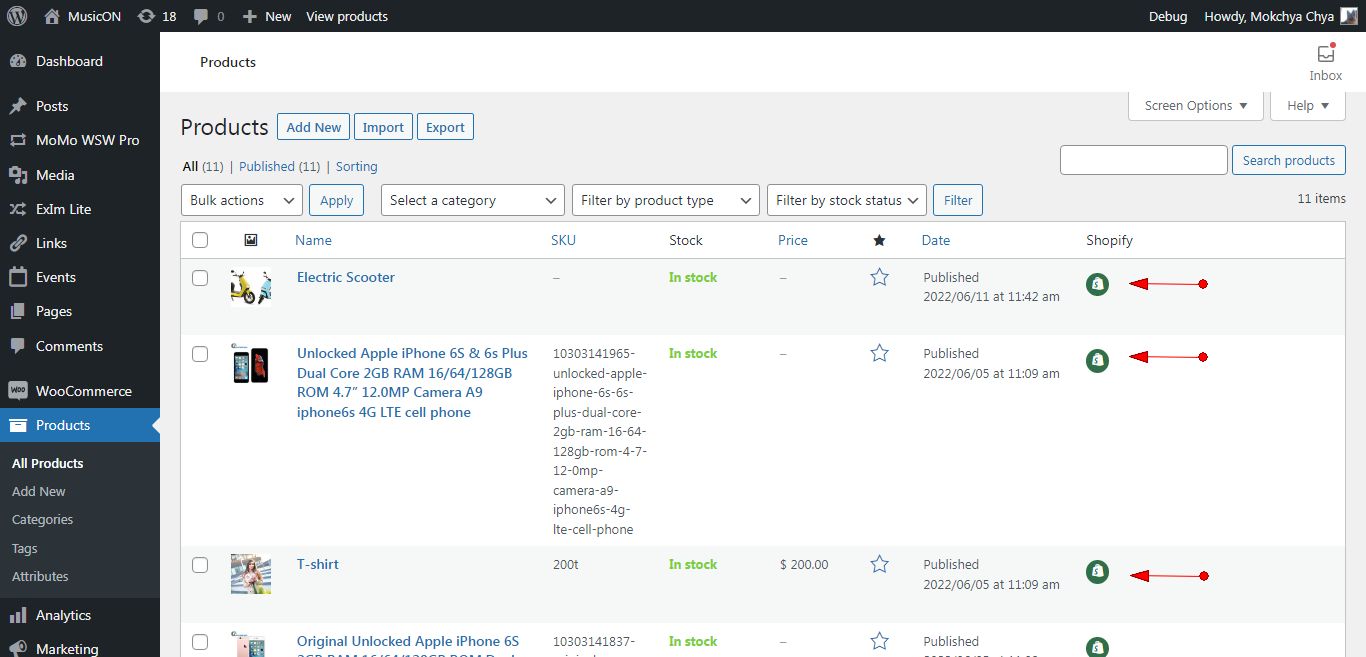
The imported product will now be available under Products menu.
Import All Products#back to top
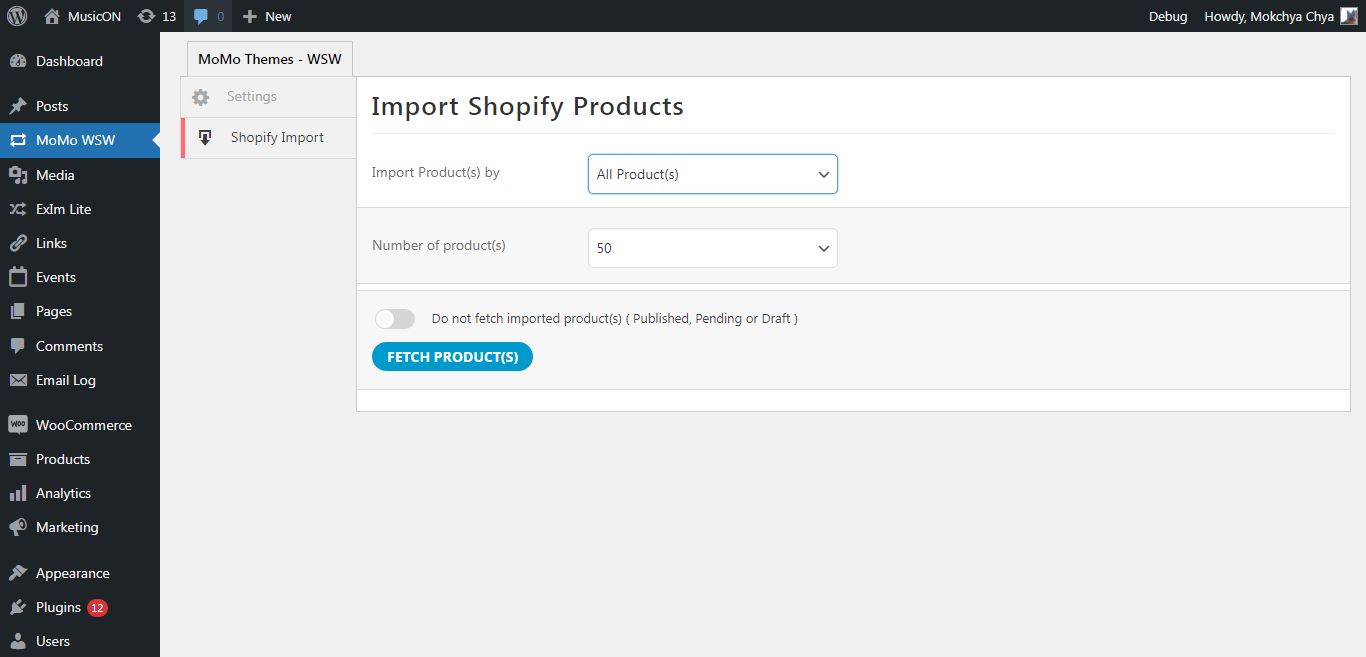
Go to Shopify Menu. Please select the number of products you want to import at a time.
If you have previously imported products already and do not want to import them again, enable ‘Do not fetch imported product(s) ( Published, Pending or Draft )’ option.
Then click on ‘Fetch Product’ button.
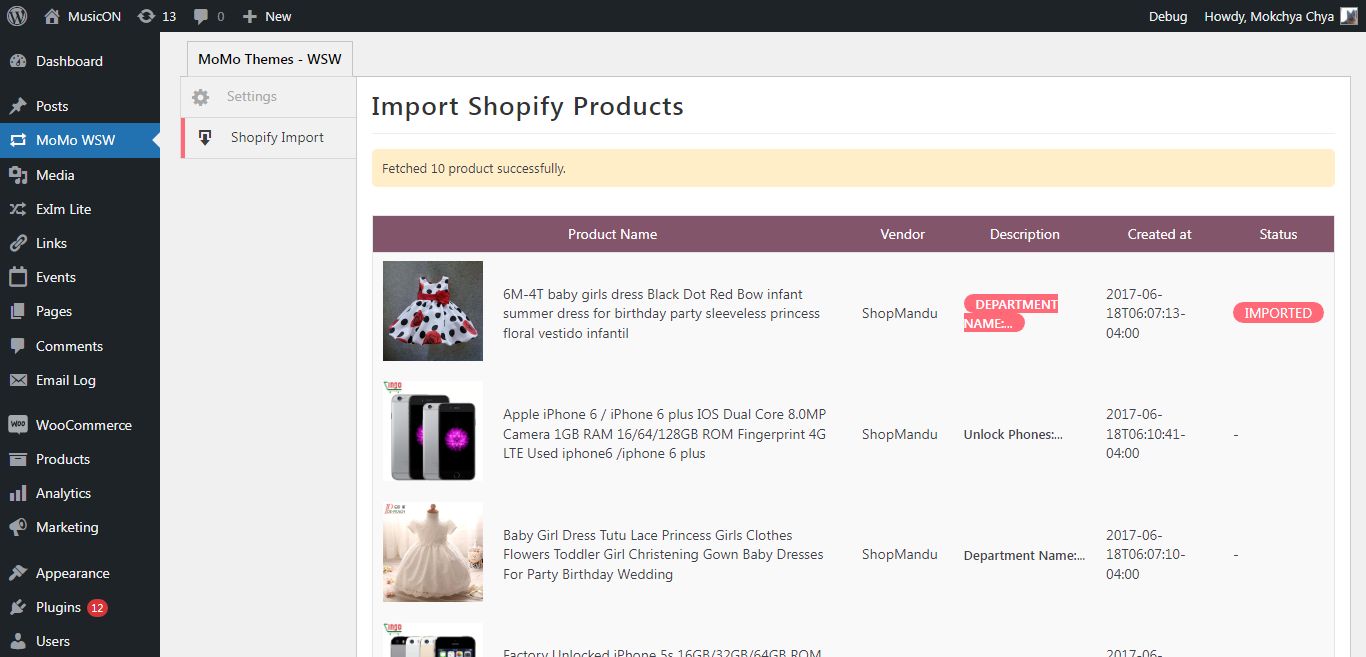
The system will fetch the products and show a success message as well as options to import tags/categories and product variations. Select these options accordingly.
Finally, choose if you want the status of imported items to be Published, Pending, Draft and then click ‘Import Product’ button
Shopify Store Details#back to top
Following information about the Shopify store will be imported:
Shipping Zones Details#back to top
Following information about the Shipping zones will be imported:
Weight Based Shipping Rates
Price Based Shipping Rates
Import Pages#back to top

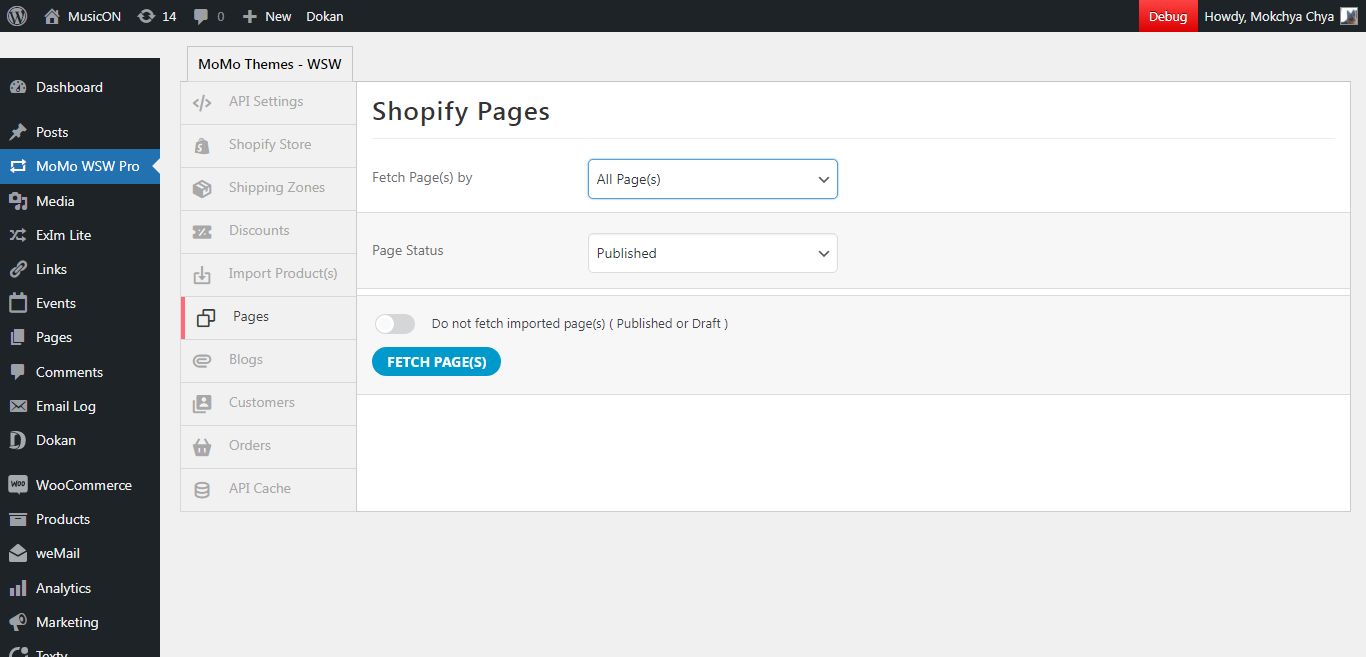
Import By ID
Go to Pages menu. Insert the page ID in the field provided.
If you have previously imported products already and do not want to import them again, enable ‘Do not fetch imported page(s) ( Published, Pending or Draft )’ option.
Then click on ‘Fetch Product’ button.
Import All Pages
This option will allow importing all pages from Shopify all at onnce.
Import Blogs#back to top
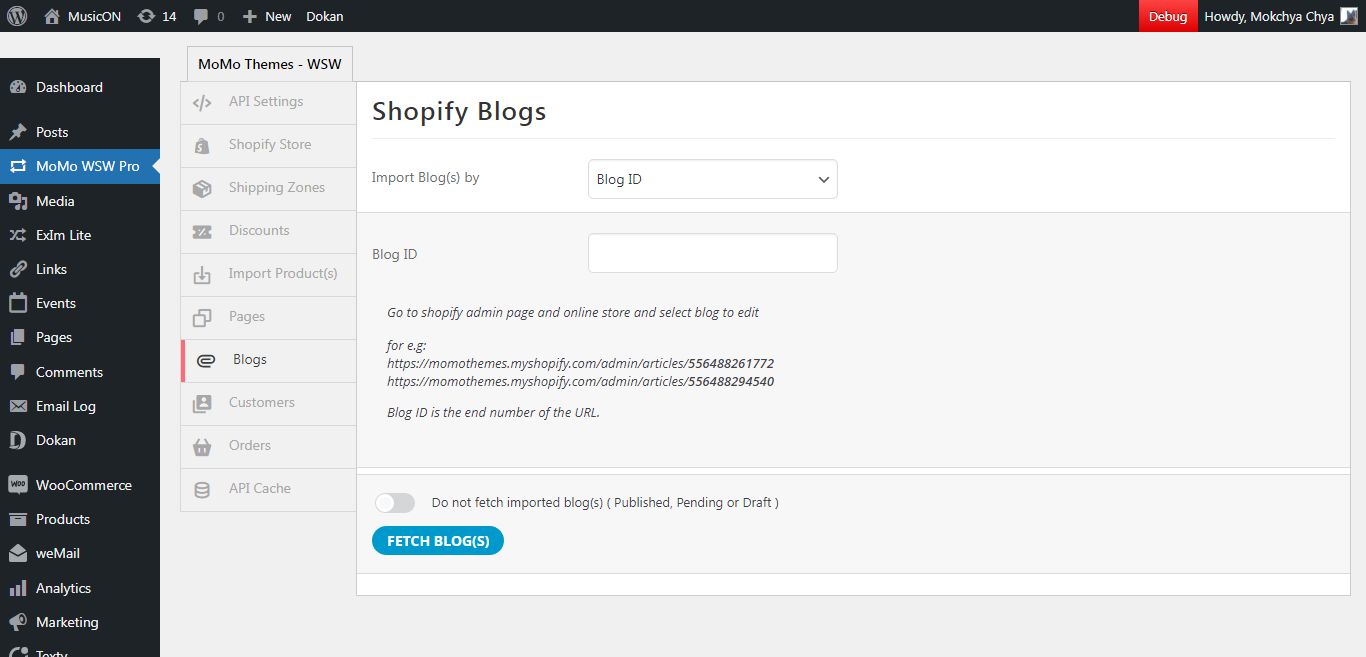
Import By ID
Go to Blogs menu. Insert the blog ID in the field provided.
Then click on ‘Fetch Product’ button.
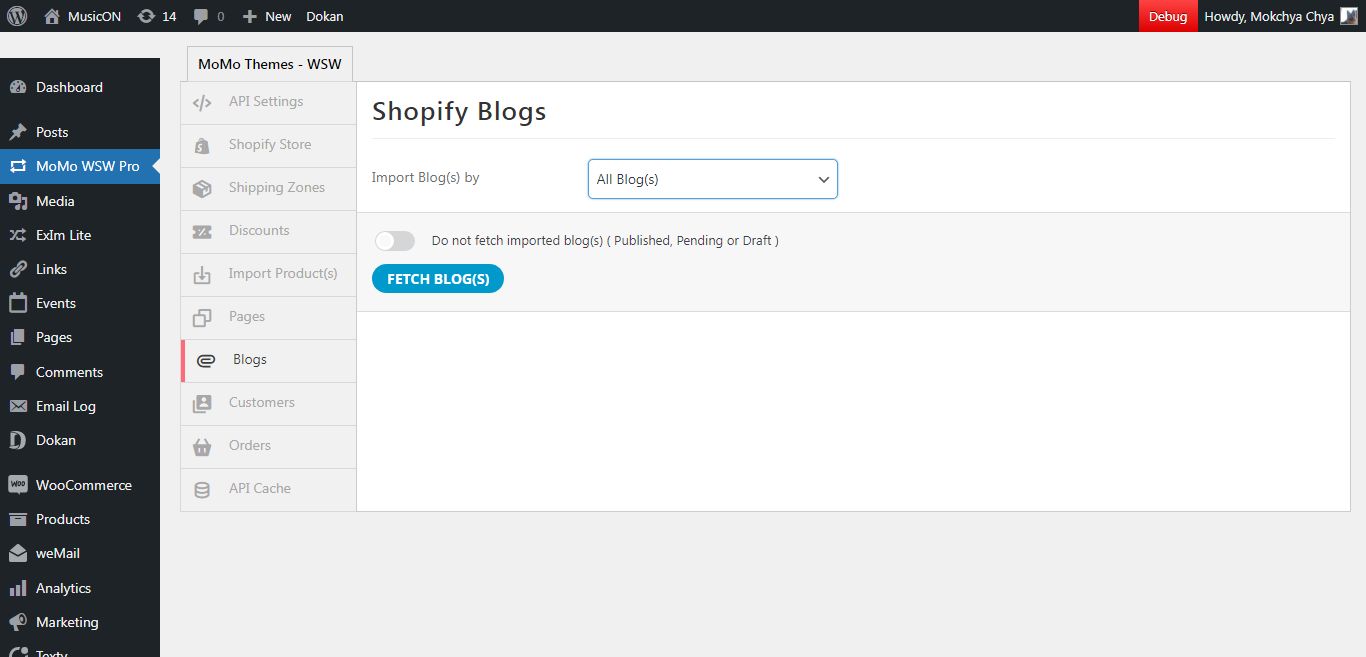
Import All Blogs
This option will allow importing all blogs from Shopify all at onnce.
If you have previously imported blog already and do not want to import them again, enable ‘Do not fetch imported blog(s) ( Published, Pending or Draft )’ option.
Import Customers#back to top

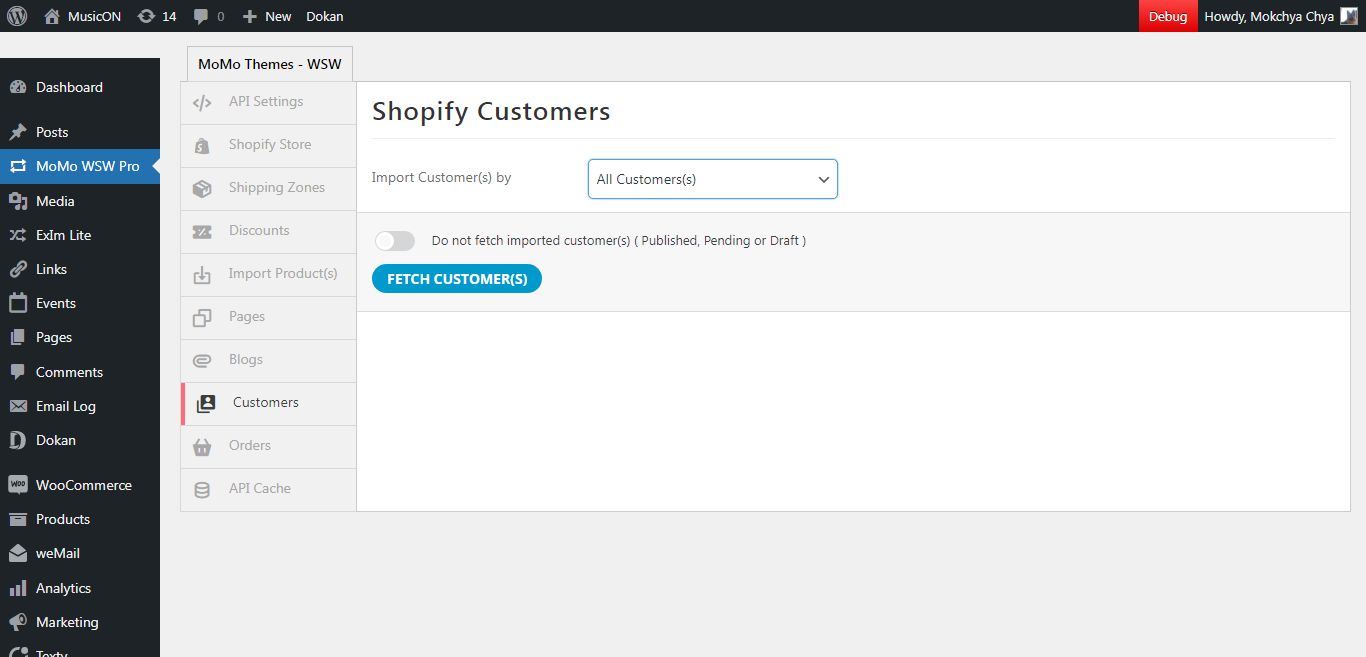
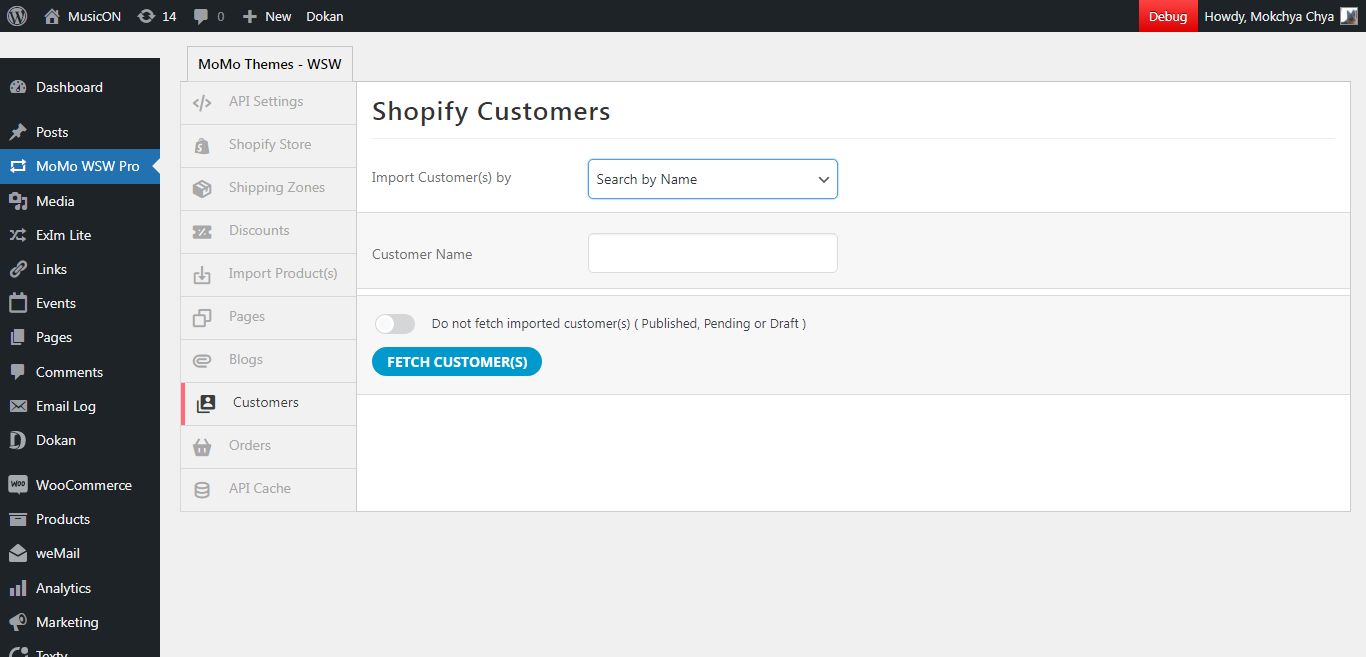
Import By ID
Go to Customers menu. Insert the customer ID in the field provided.
Then click on ‘Fetch Customer’ button.
Import All Customers
This option will allow importing all customers from Shopify all at once.
If you have previously imported blog already and do not want to import them again, enable ‘Do not fetch imported customer(s) ( Published, Pending or Draft )’ option.
Search and Import Customers
This will allow searching customers by their name and then importing.
Import Orders#back to top
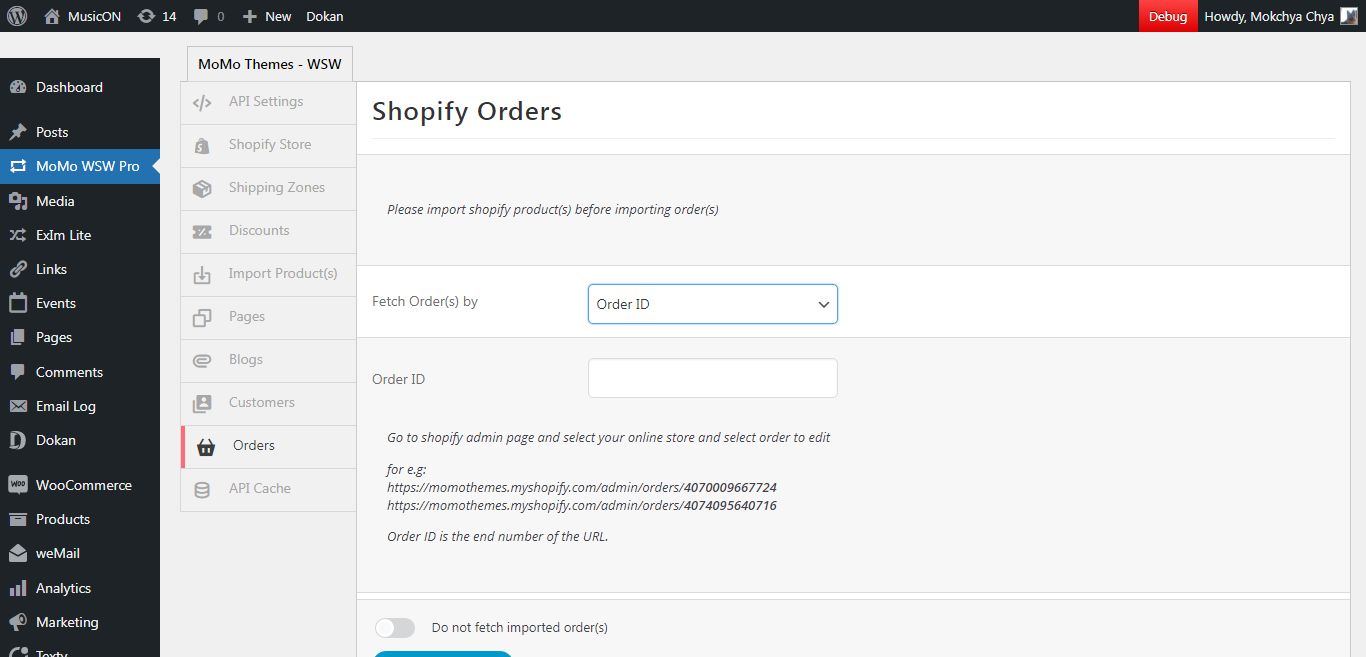
Import By ID
Go to Orders menu. Insert the order ID in the field provided.
Then click on ‘Fetch Order’ button.
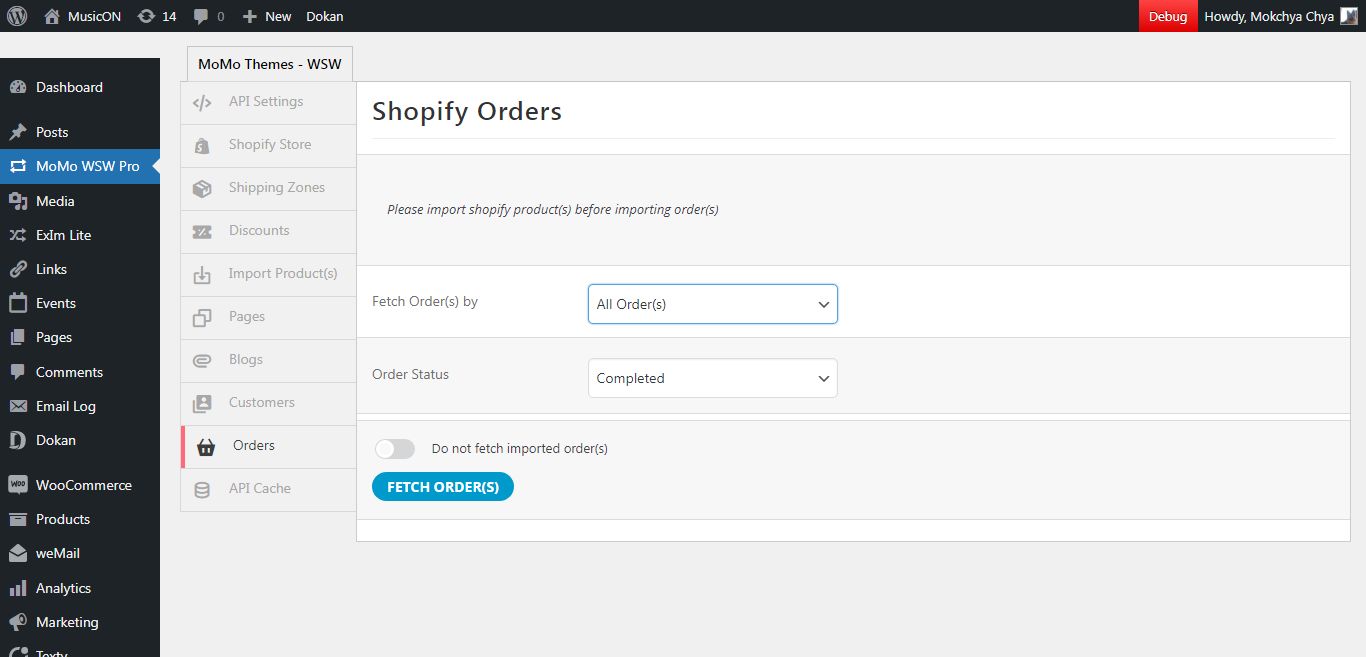
Import All Orders
This option will allow importing all orders. Import can be based on complated, draft, or all.
If you have previously imported orders already and do not want to import them again, enable ‘Do not fetch imported order(s) ( Published, Pending or Draft )’ option.
Export to Shopify#back to top

Export Product
Crate a new product or open an existing product. You will see a green "Export product to Shopify" green button at the botton of Publish metabox. Click the button and the product and the available details will be pushed and a new product will be created in Shopify store.
Export Settings
You can find available options for export under MoMoWSW Pro > Export Settings
Support Desk #back to top
Our support covers assistance with issues directly linked to the plugin only. We cannot provide web design agency service or help with customization requests. Sometimes we may help with small tweaks, but they are not always guaranteed.
Please visit our profile page or ask question info@momothemes.com
Support for item includes:- * Responding to questions or problems regarding the item and its features
- * Fixing bugs and reported issues
- * Providing updates to ensure compatibility with new software versions
- * Customization and installation services
- * Support for third party software and plug-ins
- * Be sure your question is not a request for custom work and is a valid Addon/Plugin issue.
- * Go through the documentation thoroughly to learn how to use the different settings before asking support on how to accomplish a task.
- * Make sure the issue is not caused by another program instead. Try disabling any active plugins and change the theme back to default WP theme and see if the issue gets resolved.
- * Undo the custom changes you have applied and check once if the issues gets resolved before contactng us for support.
Files Included #back to top
Given css file primarily contains all the code used for styling the admin panels. Use the codes in the file to customize the addon/plugin even further. The included file is under momowsw/assets/css/
- 1. momo_wsw_admin.css - Admin side stylesheet
This is the Javascript file with custom codes used to make the addon/plugin work. All JavaScript codes are included under momowsw/assets/js/
- 1. momo_wsw_admin.js - JavaScripts